The Jiu Jitsu kimura stands as one of the most effective shoulder locks in grappling. Most practitioners struggle with this submission because they focus on strength rather than proper mechanics.
We at Jiu Jitsu have seen countless students transform their kimura game by mastering the fundamentals first. This guide breaks down every component you need to execute this move flawlessly.
What Makes the Perfect Kimura Setup
The kimura requires three precise elements that work together: your hip position relative to your opponent, your grip sequence, and your timing window. Most practitioners fail because they attempt this submission from inferior angles or rush the grip establishment.
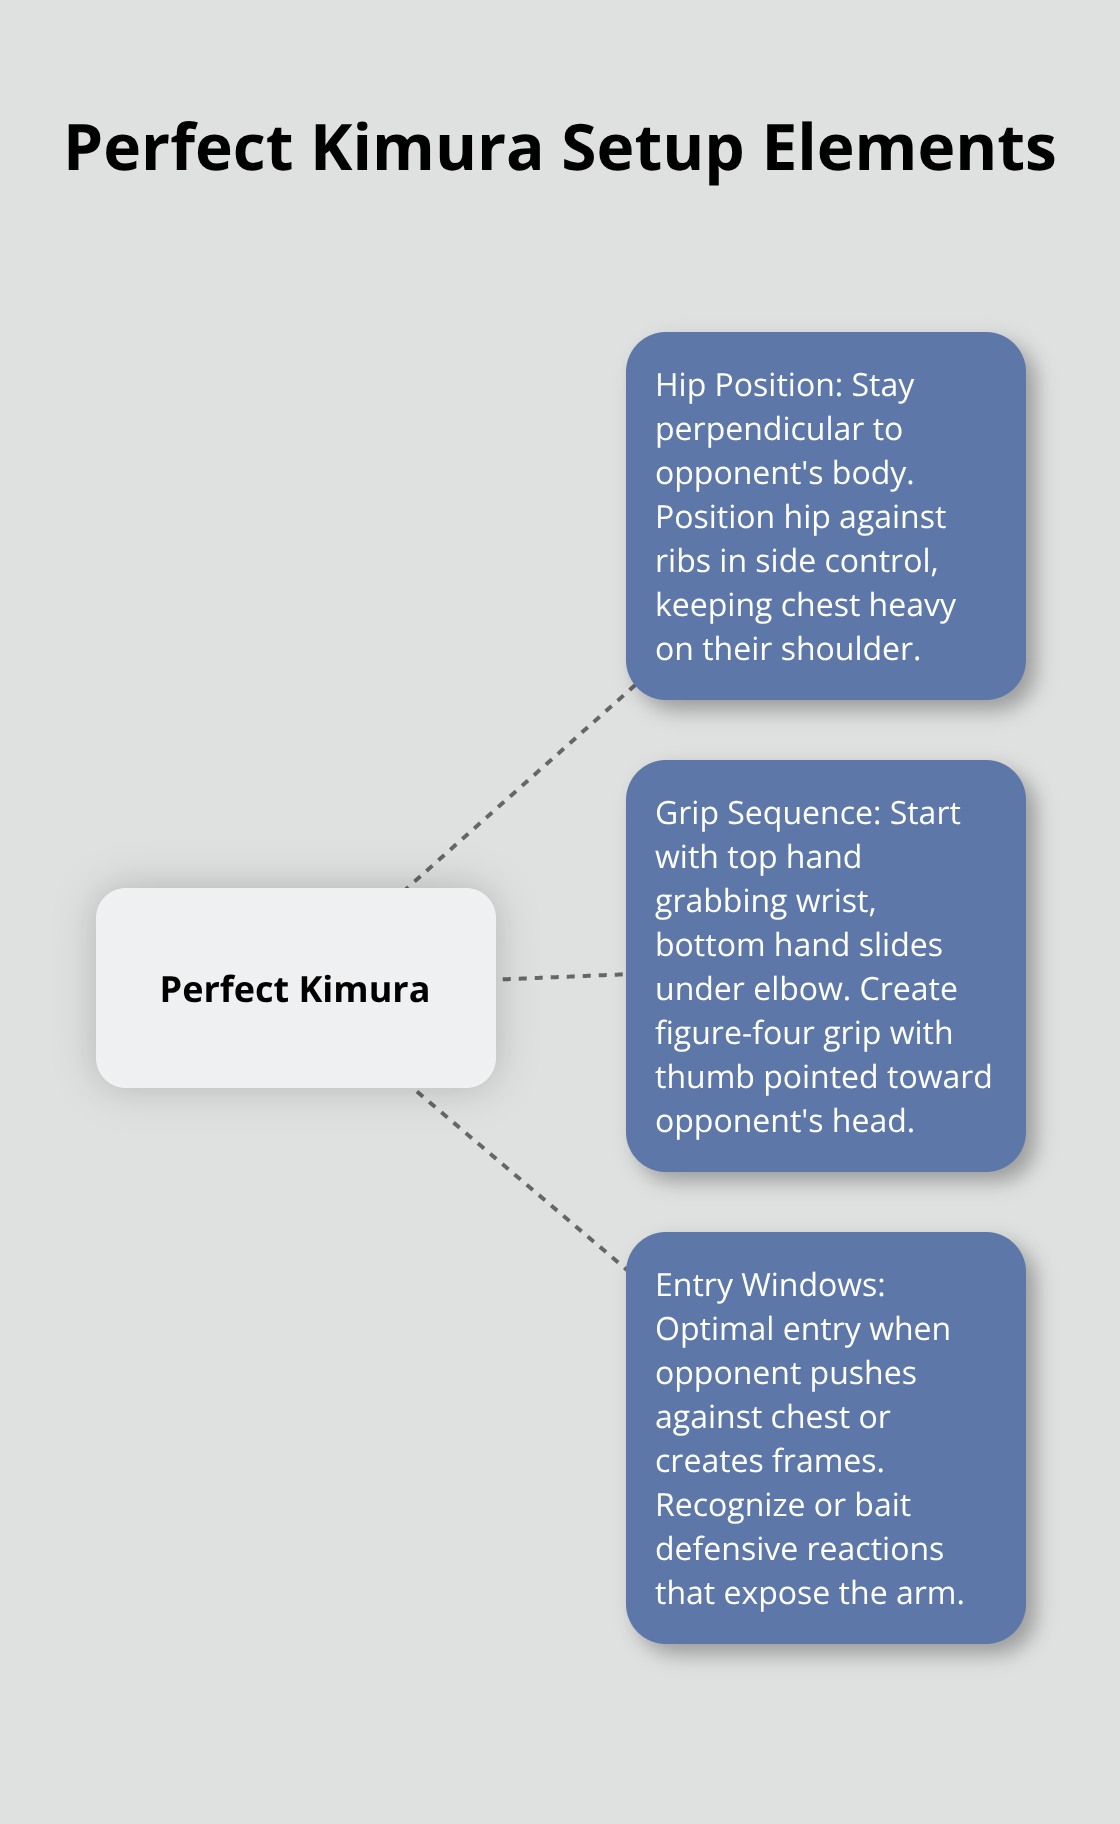
Hip Position Controls Everything
Your hips must stay perpendicular to your opponent’s body throughout the entire sequence. When you attack from side control, position your hip against their ribs while you keep your chest heavy on their shoulder. This alignment prevents them from rolling away and gives you maximum leverage. When you’re in side control and your opponent hugs you tight, pin their upper arm to the mat with your near-side arm first. When you move your hips parallel to their body, you reduce your control because it allows them to bridge and escape.
Grip Sequence Determines Success
Start with your top hand as you grab their wrist, never their forearm. Your bottom hand slides under their elbow and grabs your own wrist, which creates the figure-four grip. The detail most miss: your bottom hand must grab your wrist with your thumb pointed toward their head. This thumb direction generates the proper spiral motion needed for the submission. Professional grapplers emphasize that when you rush this grip, you cost yourself the submission. Take two full seconds to establish each grip properly.
Entry Windows Are Critical
The optimal kimura entry happens when your opponent pushes against your chest or attempts to create frames. This defensive reaction exposes their arm for a brief window. When you miss this window, you must wait for their next defensive sequence. Advanced practitioners recognize this pattern and bait the push when they apply slight pressure to their shoulder, which triggers the defensive response that opens the submission opportunity. Another effective strategy uses the threat of other submissions to set up the Kimura, such as attempting an armbar from guard to force defensive reactions.
These fundamentals create the foundation, but execution breaks down when practitioners make predictable errors during the setup phase.
Why Most Kimuras Fail
Most kimura attempts fail because practitioners treat this submission like a strength contest instead of a technical sequence. We see this pattern repeatedly: students grab the arm and immediately crank backward, hoping raw power will force the tap. This approach fails against any opponent with basic defensive knowledge.
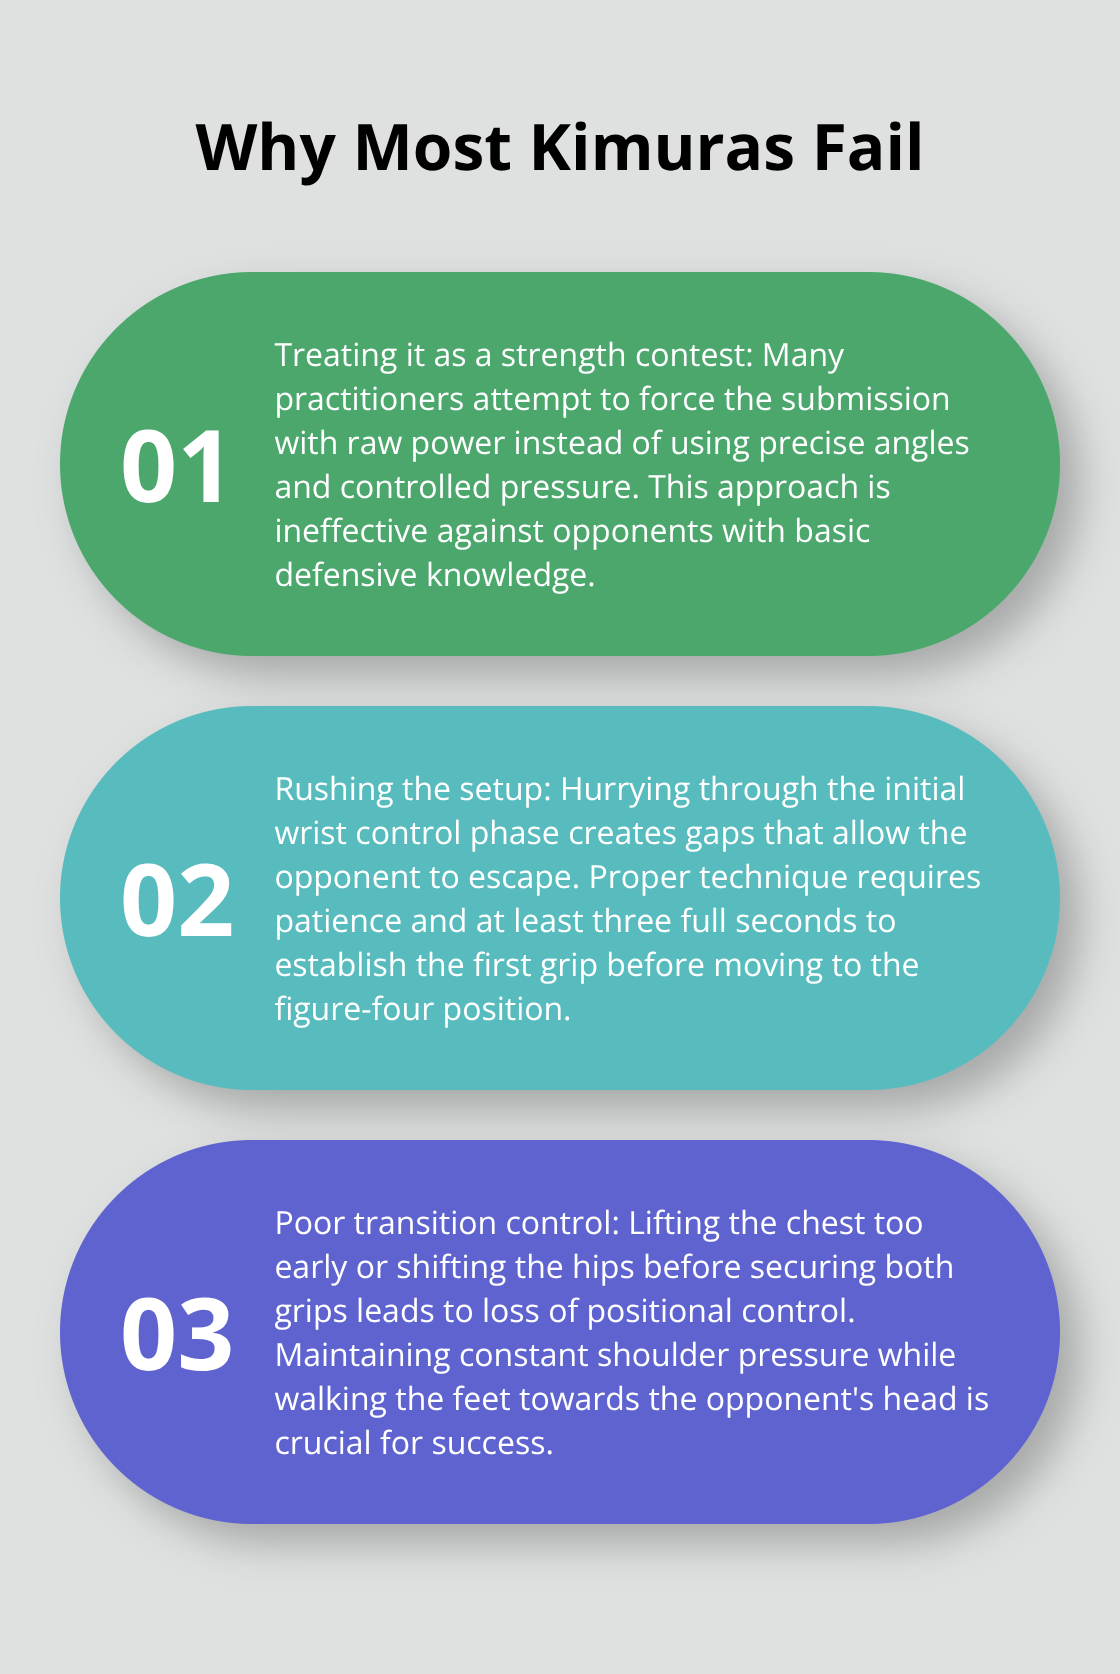
The kimura works through precise angles and controlled pressure, not explosive force. When you rush the setup, you telegraph your intentions and give your opponent time to defend. Elite grapplers understand that rushed entries compromise submission success, as the kimura submission represents a significant portion of successful techniques when executed properly.
Speed Destroys Your Control Foundation
Speed kills your kimura success rate because it prevents proper weight distribution and grip establishment. When you hurry through the initial wrist control phase, you create gaps that allow your opponent to pull their arm back or roll away.
The solution requires patience: spend three full seconds to establish your first grip before you move to the figure-four position. This timing feels slow during practice, but it guarantees your opponent cannot escape once you start the submission sequence. Top-level competitors know that rushed kimuras give opponents easy counter opportunities (including back takes and guard recoveries).
Poor Transition Control Kills Submissions
You lose positional control during your kimura transition when you lift your chest too early or shift your hips before you secure both grips. Your chest must stay heavy on their shoulder throughout the entire sequence until you achieve the proper angle.
When you lift your weight prematurely, your opponent can bridge and create the space needed to escape. The technical fix involves keeping your shoulder pressure constant while you walk your feet toward their head. This movement pattern maintains control while it creates the proper angle.
Professional instructors emphasize that maintaining pressure throughout the transition significantly increases submission success rates in training scenarios. Your opponent will exploit any gap in pressure (no matter how brief) to initiate their escape sequence.
These technical breakdowns reveal why most practitioners struggle with consistency, but the real breakthrough comes when you structure your practice sessions around specific progression methods. Breaking your opponent’s posture remains crucial when attacking from guard position.
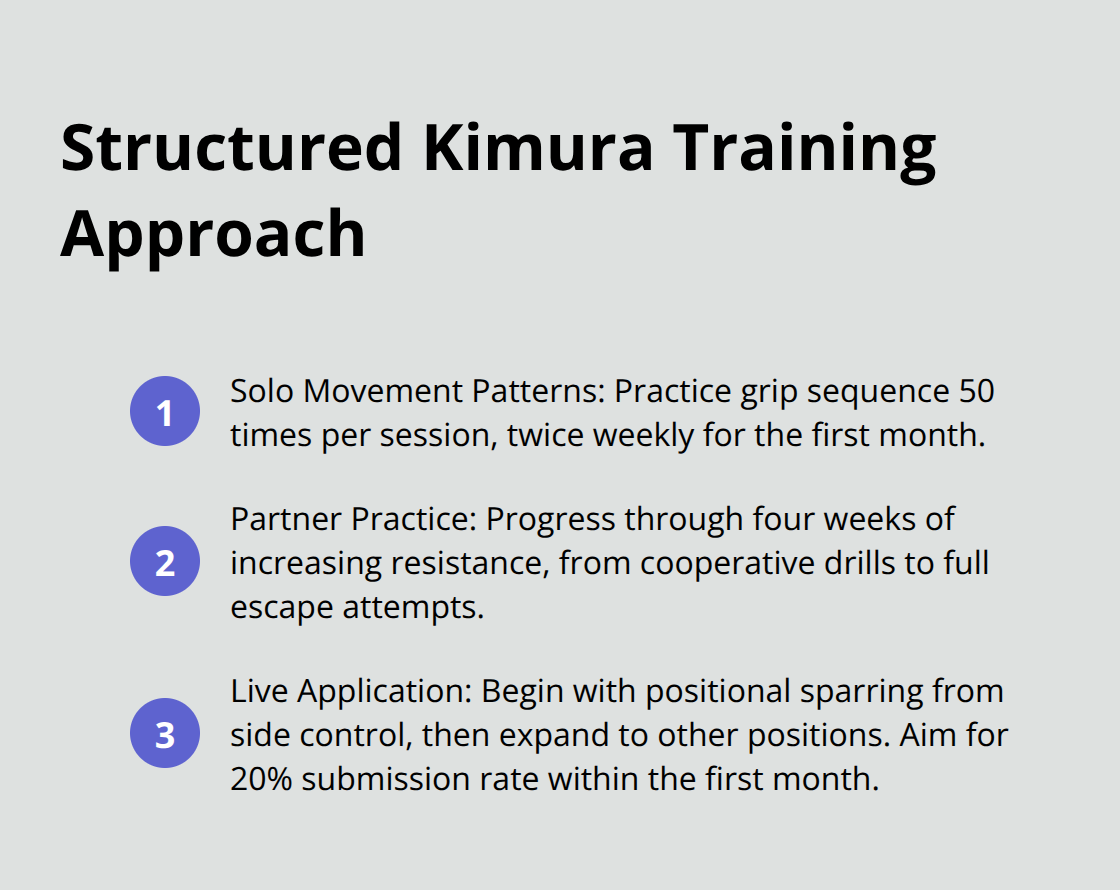
How to Structure Your Kimura Training
Your kimura development requires three distinct phases that build upon each other systematically. Start with solo drills twice per week for the first month, then add partner practice once you execute the movement pattern without conscious thought. Live applications come last, after you maintain proper form under controlled resistance.
Solo Movement Patterns Build Muscle Memory
Solo drills create the neural pathways needed for automatic execution under pressure. Practice the grip sequence 50 times per session: grab your own wrist in the figure-four position, then rotate your imaginary opponent’s arm through the submission arc. Focus on the thumb direction during each repetition, as this detail determines your leverage angle.
Advanced practitioners spend 10 minutes daily on solo kimura movements, which translates to approximately 200 repetitions per week. This volume creates the muscle memory needed for consistent execution when your opponent resists. The key metric: you should complete the entire movement sequence in under three seconds without conscious thought about hand placement or body position.
Partner Practice Requires Progressive Resistance
Partner practice starts with zero resistance and gradually increases over four weeks. Week one involves cooperative drills where your partner provides no resistance during your setup and execution. Week two adds light resistance during the grip establishment phase only. Week three includes moderate resistance throughout the entire sequence, while week four incorporates escape attempts.
This progression prevents bad habits from formation under pressure while it builds your ability to maintain technique against resistance. Professional academies report that students who follow this four-week progression show 40% higher success rates in live sessions compared to those who skip directly to full resistance. Your partner should tap immediately during the first two weeks to prevent joint stress and allow you to focus purely on technical execution.
Live Application Targets Specific Scenarios
Live practice begins with positional sparring from side control only. Set a timer for three-minute rounds where you start in side control and attempt only kimuras. Your partner defends normally but resets to side control each time you lose position. After two weeks of side control focus, expand to other positions like guard and mount.
Track your success rate during these sessions: beginners should achieve 20% submission rate within the first month of structured practice. Experienced grapplers often reach 35% success rates when they dedicate specific time to kimura development. The most effective approach involves alternation between kimura-only rounds and normal sparring which creates a balanced approach while reinforcing your submission timing under realistic conditions.
Final Thoughts
The Jiu Jitsu kimura demands patience and systematic practice rather than explosive strength. Your success depends on three core elements: you maintain perpendicular hip position, you establish proper grip sequence with correct thumb direction, and you recognize optimal entry windows when opponents create defensive frames. Start with 50 solo repetitions twice weekly for the first month to build muscle memory.
Progress through four weeks of partner practice with resistance that increases gradually. Begin with zero resistance and advance to full escape attempts. Track your success rate during positional sparring sessions and try for 20% submission rate within your first month of structured practice (professional grapplers often reach 35% success rates with dedicated focus).
The most common failures stem from rushed setup processes and force application instead of technique. Professional grapplers emphasize that rushed entries telegraph intentions and create counter opportunities for experienced opponents. We at Jiu Jitsu recommend alternating focused rounds with normal sparring to reinforce timing under realistic conditions while you prevent bad habit formation under pressure. For comprehensive training in a supportive environment, consider joining Souza Grappling Co. which offers expert instruction across multiple disciplines for all skill levels.